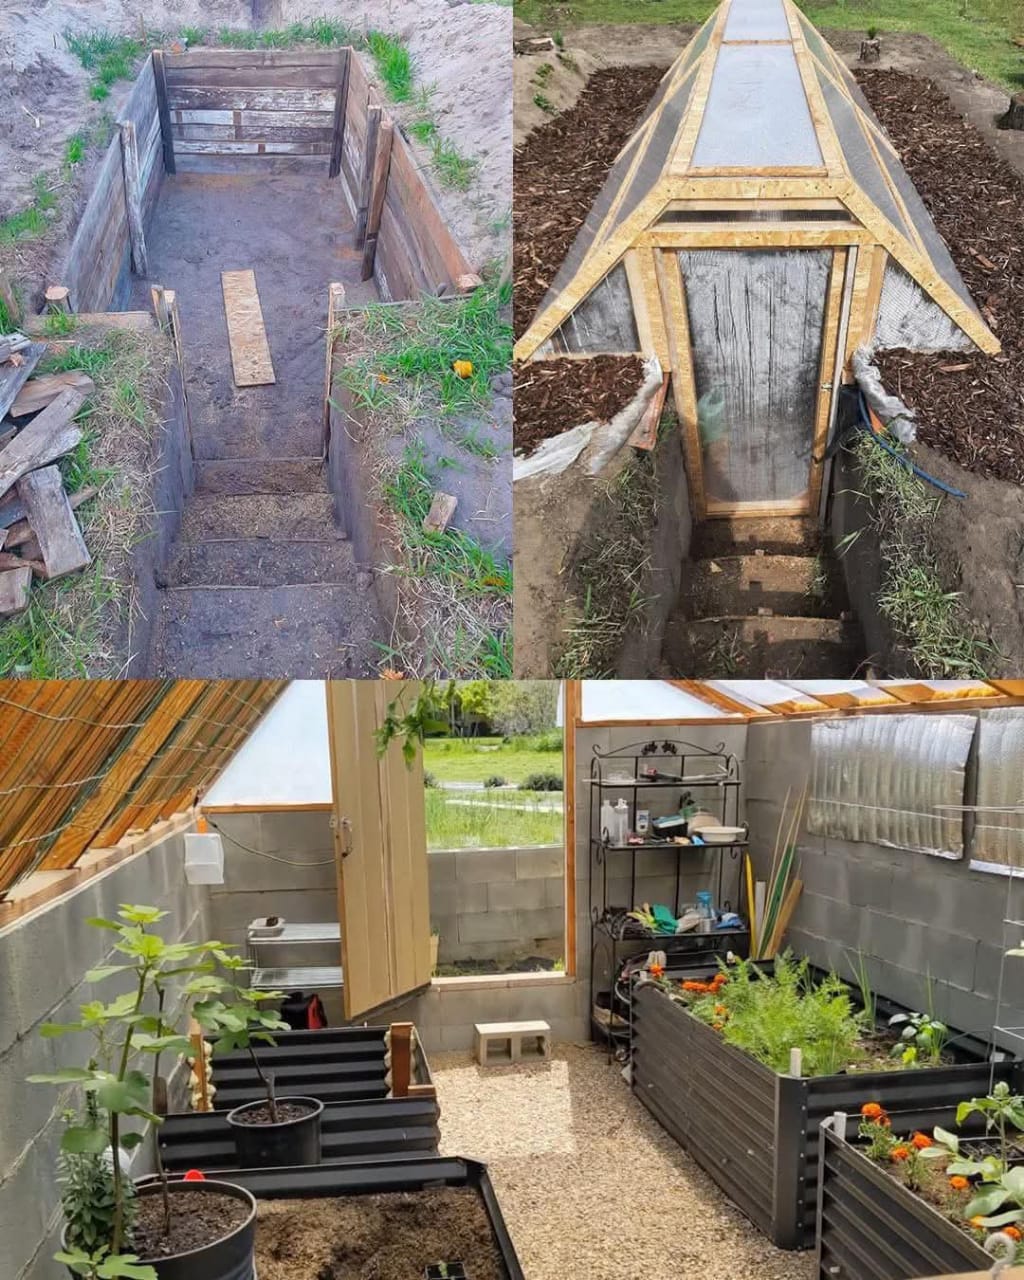
A Walipini
(also called an underground or pit greenhouse) uses the earth’s natural insulation to maintain a stable temperature, allowing for year-round food production, even in colder climates. Below is a step-by-step guide to building one:
Materials Needed:
- Shovels, pickaxe, or excavation equipment
- Wooden planks or concrete blocks for reinforcement
- plastic or polycarbonate panels
- Wood or metal for framing
- Drainage pipes and gravel
- Insulation material (such as reflective insulation or straw bales)
Step 1: Choose the Right Location
- Select a south-facing slope (in the Northern Hemisphere) for maximum sun exposure.
- Ensure proper drainage to prevent water accumulation.
- Avoid areas with a high water table to prevent flooding.
Step 2: Dig the Pit
- Excavate the greenhouse at least 6 to 8 feet deep for temperature stability.
- Create a ramp or stairs for easy access.
- Slope the back wall slightly to reflect sunlight onto plants.
Step 3: Build Structural Walls
- Reinforce the walls with wood, stone, or concrete blocks to prevent collapse.
- Consider adding a drainage layer (gravel + perforated pipes) to manage excess water.
